I2c scanner: Difference between revisions
From wikiluntti
(→Theory) |
(→Theory) |
||
| (2 intermediate revisions by the same user not shown) | |||
| Line 4: | Line 4: | ||
== Theory == | == Theory == | ||
[[Arduino_i2cScanner.png|The Scanner from IDE]] | [[File:Arduino_i2cScanner.png|thumb|The Scanner from IDE]] | ||
[[File:Arduino i2c scanner.png|thumb|Output of the scanner]] | [[File:Arduino i2c scanner.png|thumb|Output of the scanner]] | ||
From Arduino IDE find “File → Examples → Wire → i2c_scanner”. Using that script, you can find out what I2C devices are connected to your Arduino Board. | From Arduino IDE find “File → Examples → Wire → i2c_scanner”. Using that script, you can find out what I2C devices are connected to your Arduino Board. | ||
I have connected the GY-91 sensor which has | |||
* MPU 9250 sensor and | |||
* BMP280 sensor. | |||
The other address 0x68 is for the other sensor and the other 0x76 is for the other sensor. | |||
== Exercises == | == Exercises == | ||
Latest revision as of 20:09, 26 November 2022
Introduction
GY-91 and many other Arduino digital sensors use I2c protocol to send the data using digital protocols.
Theory


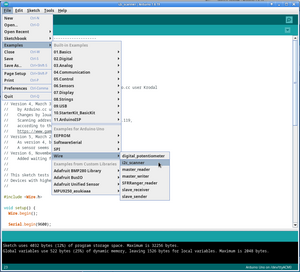
From Arduino IDE find “File → Examples → Wire → i2c_scanner”. Using that script, you can find out what I2C devices are connected to your Arduino Board.
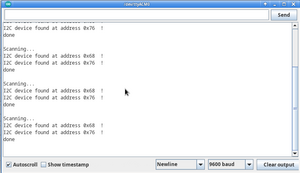
I have connected the GY-91 sensor which has
- MPU 9250 sensor and
- BMP280 sensor.
The other address 0x68 is for the other sensor and the other 0x76 is for the other sensor.
Exercises
References
- Two arduinos as master and slave: https://www.instructables.com/Arduino-and-I2C/
- https://dronebotworkshop.com/i2c-arduino-arduino/