Install ev3dev: Difference between revisions
No edit summary |
No edit summary |
||
| (5 intermediate revisions by the same user not shown) | |||
| Line 1: | Line 1: | ||
<languages /> | |||
<translate> | |||
=== Ev3dev.org === <!--T:1--> | |||
<!--T:2--> | |||
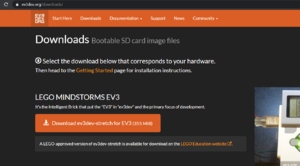
Download the newest SD card image from https://www.ev3dev.org/downloads/. | Download the newest SD card image from https://www.ev3dev.org/downloads/. | ||
<!--T:3--> | |||
[[File:Ev3devWebsite.png|thumb|Ev3dev website]] | [[File:Ev3devWebsite.png|thumb|Ev3dev website]] | ||
=== Balena Etcher === | === Balena Etcher === <!--T:4--> | ||
<!--T:5--> | |||
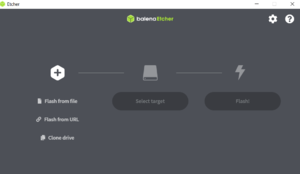
Write the image to the SD card using [https://www.balena.io/etcher/ Balena Etcher] or some other software. | Write the image to the SD card using [https://www.balena.io/etcher/ Balena Etcher] or some other software. | ||
[[File:BalenaEtcher.png|thumb|Balena Etcher is straightforward to use.]] | [[File:BalenaEtcher.png|thumb|Balena Etcher is straightforward to use.]] | ||
=== Connection === | === Connection === <!--T:6--> | ||
<!--T:7--> | |||
If Internet connection from the brick is not needed, connecting to the brick is straightforward and easy. | If Internet connection from the brick is not needed, connecting to the brick is straightforward and easy. | ||
==== Bluetooth ==== | ==== Bluetooth ==== <!--T:8--> | ||
<!--T:9--> | |||
Establish the Bluetooth connection on computer and brick by pairing. It is very straightforward. | Establish the Bluetooth connection on computer and brick by pairing. It is very straightforward. | ||
==== USB cable ==== | ==== USB cable ==== <!--T:10--> | ||
<!--T:11--> | |||
Windows will detect your EV3 as a Remote NDIS Compatible Device. . . | Windows will detect your EV3 as a Remote NDIS Compatible Device. . . | ||
==== Wifi ==== | ==== Wifi ==== <!--T:12--> | ||
=== Visual Studio Code === | === Visual Studio Code === <!--T:13--> | ||
<!--T:14--> | |||
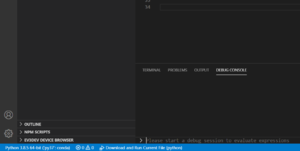
Install some extensions: the newest ev3dev-browser, and some Python related stuff VS studio needs to install. Connect to the brick by clicking the ''ev3dev device browser'' from down left. See the [https://www.youtube.com/watch?v=zw20vb5YrrA video] (embedded below) how to install and set up ev3dev browser. Note that LEGO's MicroPython extension is not needed. We use Ev3dev Python v2. | Install some extensions: the newest ev3dev-browser, and some Python related stuff VS studio needs to install. Connect to the brick by clicking the ''ev3dev device browser'' from down left. See the [https://www.youtube.com/watch?v=zw20vb5YrrA video] (embedded below) how to install and set up ev3dev browser. Note that LEGO's MicroPython extension is not needed. We use Ev3dev Python v2. | ||
<!--T:15--> | |||
<youtube>zw20vb5YrrA</youtube> | <youtube>zw20vb5YrrA</youtube> | ||
<!--T:16--> | |||
[[File:Vs ev3devbrowser.png|thumb|Connect the brick from down left, then up middle.]] | [[File:Vs ev3devbrowser.png|thumb|Connect the brick from down left, then up middle.]] | ||
<!--T:17--> | |||
The folder in VS Code in be downloaded into VS Code by clicking, and the script can be run from the ''device browser''. | The folder in VS Code in be downloaded into VS Code by clicking, and the script can be run from the ''device browser''. | ||
<!--T:18--> | |||
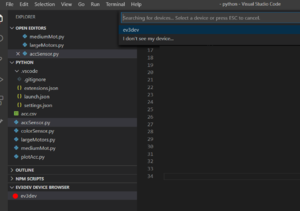
[[File:Vs ev3devbrowser2.png|thumb|Search for the devices.]] | [[File:Vs ev3devbrowser2.png|thumb|Search for the devices.]] | ||
==== Automated launching ==== | ==== Automated launching ==== <!--T:19--> | ||
Add the file launch.json in the .vscode folder, and copy paste the following script in there | <!--T:20--> | ||
Add the file <code>launch.json</code> in the .vscode folder, and copy paste the following script in there | |||
<!--T:21--> | |||
<syntaxhighlight> | <syntaxhighlight> | ||
{ | { | ||
| Line 49: | Line 65: | ||
"type": "ev3devBrowser", | "type": "ev3devBrowser", | ||
"request": "launch", | "request": "launch", | ||
"program": "/home/robot/${workspaceRootFolderName}/ | "program": "/home/robot/${workspaceRootFolderName}/${relativeFile}" | ||
} | } | ||
] | ] | ||
| Line 55: | Line 71: | ||
</syntaxhighlight> | </syntaxhighlight> | ||
and the program will be downloaded and run by pressing F5. | and the program will be downloaded and run by pressing F5. | ||
</translate> | |||
Latest revision as of 17:21, 16 October 2020
<languages /> <translate>
Ev3dev.org
Download the newest SD card image from https://www.ev3dev.org/downloads/.

Balena Etcher
Write the image to the SD card using Balena Etcher or some other software.

Connection
If Internet connection from the brick is not needed, connecting to the brick is straightforward and easy.
Bluetooth
Establish the Bluetooth connection on computer and brick by pairing. It is very straightforward.
USB cable
Windows will detect your EV3 as a Remote NDIS Compatible Device. . .
Wifi
Visual Studio Code
Install some extensions: the newest ev3dev-browser, and some Python related stuff VS studio needs to install. Connect to the brick by clicking the ev3dev device browser from down left. See the video (embedded below) how to install and set up ev3dev browser. Note that LEGO's MicroPython extension is not needed. We use Ev3dev Python v2.

The folder in VS Code in be downloaded into VS Code by clicking, and the script can be run from the device browser.

Automated launching
Add the file launch.json in the .vscode folder, and copy paste the following script in there
{
    "version": "0.2.0",
    "configurations": [
        {
            "name": "Download and Run",
            "type": "ev3devBrowser",
            "request": "launch",
            "program": "/home/robot/${workspaceRootFolderName}/${relativeFile}"
        }
    ]
}
and the program will be downloaded and run by pressing F5.
</translate>